Creating a Kitchen DIY Style
A DIY kitchen not only saves money but creates a space for you and your family to be creative with ideas on how to accomplish your desired end result. It’s also the perfect way to add the personal touch to your dream kitchen. There are several ways you can go about creating your DIY kitchen. From simply sanding and painting your kitchen cabinets a new colour and buying new door handles, knobs or pulls and fitting them to buying ready-made cabinets and installing them. You could even buy pre-made cabinets that are measured and in pieces ready to be put together by you. It is recommended to do this project with 2 people so you can help each other level and adjust or measure the cabinetry when installing it. Depending on the budget you have in mind for your DIY kitchen project, you will choose to refresh the kitchen by painting it or if you have a bigger budget you will be able to buy ready-made kitchen cabinetry units or easy-to-construct wood panels that will make up your kitchen units. To source the cabinetry and get ideas of the style of DIY kitchen you want to create it’s useful to go in to your local Scotland-based kitchen showroom. You can present your ideas for your DIY kitchen and their craftsmen can make your bespoke cabinets, or you can choose the cabinetry that’s ready-made that you will install yourself.
Either way, DIY saves costs on instalment and fitting. If you have a good eye for design you could design your new kitchen yourself or you could use a kitchen designer to come up with a design for you to work on the instalment yourself. There will be other areas that you can work on that will give your kitchen a refreshed look, such as investing in new appliances and perhaps redoing your backsplash so it gives your kitchen a completely new look. DIY backsplashes are a fun part of your kitchen makeover. From mosaic to shaved stones to ceramic tiles you can play around with the look you are after. You can also invest in new seating to surround your kitchen island If you have one. These can be chunky wooden stools or stainless steel bar stools with cushioned seat pads of a colour of your choice.
Deciding on which DIY process you want to carry out
It’s important to have a budget in mind before you set about making decisions on what your costs will be. If you feel you have a smaller budget and want to give your kitchen a makeover and not do too much work on it then buying paint and door handles will be a cost you will need to invest in. Depending on your current kitchen, choose a colour for the cabinetry that you feel will fit in with the theme and style of your house. Is it modern and elegant or is it more traditional? You may even want a farmhouse style kitchen. You can also invest in a cabinet that will hold your sink. This can be bespoke or custom-made or bought ready-made that you can install yourself. If you are attaching the sink and feel you need the help of a plumber then you can source a local Scotland-based plumber to work on your sink area and also the plumbing of your washing machine should you wish to install one.
If you have a bigger budget you can order cabinetry that is pre-made that you fit into your space or you can send the measurements to your local Scotland kitchen company for them to make your bespoke cabinetry that you will install yourself. If you buy cabinetry that you assemble yourself it will require more work but can definitely be done as the kitchen company you buy your cabinetry panels from will give you a manual on how to construct
the cabinetry. Buying ready built units will be easier and will mean you will just need to install them.
Designing your DIY kitchen
Once you have chosen which DIY process you want to use, you need to design that layout of your cabinetry as well as where you will place your appliances. You need to measure your area. If you are planning the design yourself you should consider that food and clothes washing should be separated and the clothes washing area can be to the side whilst food preparation will be done in the kitchen island area if it has a worktop. Worktops can be near the stove, kitchen sink and fridge.
Choosing appliances for your kitchen
If you plan to upgrade your appliances, you will need to buy a new fridge and freezer, a stove, washing machine and dryer. A new kettle, toaster, blender, microwave, toasted cheese griller would also give your kitchen a fresh, clean aesthetic appeal. You will need to decide where these smaller appliances will be placed ahead of time, during the design phase. If your budget doesn’t allow for new appliances you can keep the current ones and maybe shift them around a bit in terms of layout if you feel they would be better positioned somewhere else. When you visit the kitchen company of your choice you could ask their in-house design team to design the layout of your kitchen and then explain it will be DIY and you will want to fit it yourself. Some kitchen companies provide this service.
Installing your cabinetry and appliances
You need to fit the feet on the base of your cabinets and place them in position. Your free standing appliances need to be put in their correct locations too. If you need to assemble your cabinets you will need to use the manual as a guide. Once you have screwed them together you can place the feet on them if they have feet. You need to make sure the cabinets are level using a spirit level. If some of your doors don’t fit properly when you install the cabinets don’t worry you can adjust them later at the hinges. You will most likely need to secure your base units together.
With DIY kitchens the company you bought the cabinetry from will provide you with the right screws in order to do this. The screws will clamp the units together, so they are connected in a long row. Clamp your units together then drill a hole into the side of the base unit and the one next to it. Put one half of the screw through the hole and the other on the other side. In tightening them the units will be secured together. You can use 2 connectors on each side. In some instances people connect units to the walls, if the unit abuts the wall. It isn’t always necessary. If there is a gap behind your cabinet, it would be a good idea to use a cabinet locking wedge screw to fit in the gap.
Lighting ideas
If you want to change or upgrade your lighting to more modern downlights that are usually LED these days, it is recommended to hire an electrician. The electrician can work on any other electrical work in the kitchen such as changing plug-point areas and fixing the wiring to the washing machine and dryer. Lighting sets the mood in your kitchen so hanging lights with lampshades may be best for you.
Creating an aesthetically pleasing stove area
Your stove is a critical appliance in your home and you may or may not choose to upgrade to a more high-tech one as you revamp your kitchen. You can choose a top-end stove that’s either gas, electrical or combined gas and electrical. You may decide you need to install a type of extractor fan to absorb any excess steam from meals you are preparing. If you decide on this it would be recommended to hire an electrician to set up your oven area.
Creating a DIY creative backsplash
Another popular kitchen feature is to install a backsplash. Backsplashes are installed in the area directly behind the stove. They protect your walls from steam, splashing sauce, grease and oil. Otherwise if you don’t have one your walls will get damaged by moisture and oils spraying up from your frying pans. Backsplashes are the perfect feature point in a DIY kitchen. You could tile them with hand-painted tiles or even the traditional white rectangular tiles for a more modern kitchen. If you are looking for a farm style country kitchen you could even install a shaved river stone backsplash for an earthy feel. You can source these materials from the Scotland-based kitchen company you have chosen to use or they can direct you to a supplier of the material you want to use. You could even design a mosaic feature for your backsplash and create a design or motif of your choice.
Fitting your Belfast sink
Your sink area should be in the vicinity of your stove for ease of movement when preparing meals. In DIY kitchens an easy sink to work with is the Belfast sink installed into a cabinet. If you choose to make use of a inset sink you can install it after the kitchen worktop is installed. If you are working with a ceramic under-mount sink there is also a process for installing that. Choose a sink from the local kitchen company you have chosen to use in the Scotland area.
Belfast sinks sit on top of the wooden unit that has been created for them. You will need to cut a hole in the top where the protruding part of the bottom needs to be situated. You can make a cardboard template first so you don’t get this wrong. Then cut it with a jigsaw. You will need to drill first for a place for your jigsaw blade to fit into, then cut around your pencil line. Ensure that your Belfast sink matches in height on either side of the unit. This needs to be done properly or your worktop won’t sit properly. Once this is complete your unit should be ready to use.
Fitting a Ceramic undermounted sink
This type of sink is mounted underneath the worktop and not on top. It will make your food preparation area look more streamlined. If your sink is made from stainless steel, you just need to use clips to screw the sink underneath your worktop. But in the case of a ceramic sink this won’t work as it’s too heavy. Start by cutting the base unit to fit on the sink. Measure your sink and decide how far forward it will sit against the worktop. Once you have figured out positioning mark your base unit. You will need to build a shelf for your sink to rest on. You could use CLS timber for this. It is inexpensive and hardy. Your sink will need to sit 1 – 2mm below the top of the unit. It must sit flush with your worktop. Then measure the inside of your unit, then cut your timber to size. Screw into your base unit on each side to fix the wood in position. Try using long screws this will help. Lower your sink on to the wood, make sure its flush with the top side of the base unit and levelled out. The new shelf
should be able to carry the weight of your ceramic sink. Next, you will fit your worktop on top. Apply silicone around the top of the sink before positioning it, This will prevent water escaping the sink.
Choosing your DIY worktops
There are many ways one can do DIY worktops. Our recommendation is to cover MDF countertop bases with a laminate of your choice. There are many colour and pattern options in laminate so choose your favourite one. Start by gluing two pieces of ¾ inch MDF together, this will create the right thickness of your countertop. Then cut them to size and sand down the edges. Make sure they are away from the wall when you put the laminate on. Cut the laminate into strips to cover the edged sides of the countertop. Make sure there is approximately 2 inches of overhang on each countertop. You can trim this down later.
Applying the laminate to the sides of the MDF countertop
Apply an even layer of contact cement on the back sides of the laminate pieces and the countertop sides. This can be done using a foam roller. Leave the glue to dry for 30 minutes and check the instructions on your specific brand of glue. You can also buy pre-made edges that you glue onto your countertop. Start on one side and smooth the piece down the whole length of the countertop side. You need to route around the edges sides. You’re your router all the way around the edges of your countertop to get rid of excess laminate. It must be flush with the wood. When all your countertop edges are covered, you need to put glue on the top area. Put contact cement on the back of the laminate and the countertop. Leave it to dry for half an hour.
Applying the laminate to the surface of the countertop
Put dowels 3-5 inches apart on the entire countertop area. They won’t stick to the contact cement and will stop the laminate from sticking to the MDF until necessary. Put the laminate sheet atop the dowels. Ensure everything lines up well. Then start pressing the laminate onto the wood, and leave a section of laminate hanging over all sides. Start from the centre and then work across to one side then do the other side. Take the dowels away as you go. Trim away extra laminate with the router bit as done before. File away the rough edges of your laminate at a 45 degree angle. The countertops job will then be complete.
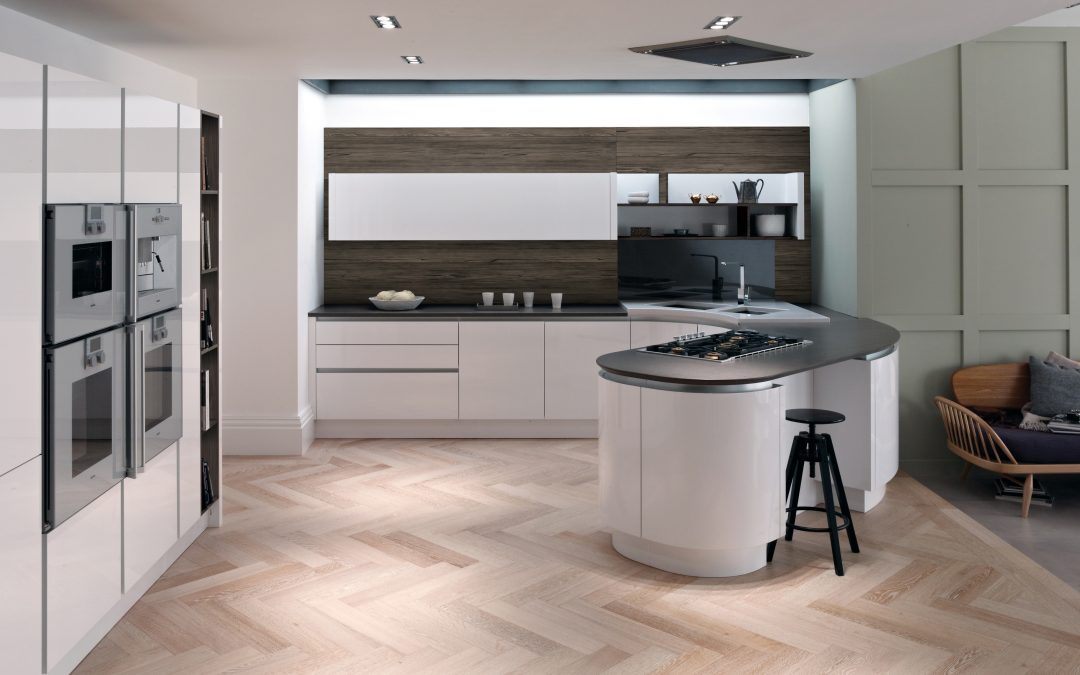
Creating a DIY kitchen island
Your kitchen will be completed with a wooden cabinet kitchen island covered by a countertop made according to the above instructions. Kitchen islands act as a work surface for meal time preparation and entertaining family and friends who can be seated around your kitchen island. The kitchen island cabinet can be bought ready-made or you can assemble one that is cut into wood panels. The kitchen island is an area to enjoy both the making of your favourite meal and the enjoyment of it. The seating you choose can be wooden and rustic or stainless steel stools with cushioning.
The perfect end result from your DIY kitchen remodel project
As can be seen a DIY kitchen takes careful planning and decisions as to how much you want to spend determining if you will be more hands-on in the building of cabinetry or you will buy already assembled units and fit them into your kitchen space. Make sure to visit your local Scotland-based kitchen showroom to aid in design and provision of wooden materials
to create your ultimate DIY kitchen. Some ideas require more work but with your creative input and personal touch you can create the DIY kitchen you have always wanted!
Recent Comments